I’m taking a break from all the drama that’s been going on and showing you an easy and fun diy paper lamp project that anyone, and I mean ANYONE, can do! I will be the first to admit when a project isn’t worth your time or at the very least I will let you know what you’re in for and let you decide. But this is one project I highly recommend you give a try. It’s relatively inexpensive, can be customized for your decor and you’ll get bragging rights amongst your friends and family. You don’t have to be crafty, creative or even very patient to do this project, and you can get it done in just a couple of hours, with most of that time spent waiting for the glue to dry. And if you’re making two paper shades like I did, the second one goes about twice as quickly as the first once you get the hang of things.
Several years ago I replaced the fabric sconces in the bedroom at the cabin with some stained glass shades that I made. Although I had a bit of experience with stained glass in the past, it was my first time making a shade and if there is one thing I learned it was that I was in over my head. I cut the pieces EXACTLY to the size I was supposed to, but when it all came together I could tell I was in trouble. There was too much space between the glass and the top plate and I knew eventually I would need to replace them, and that day came a couple of months ago when the pieces completely separated.
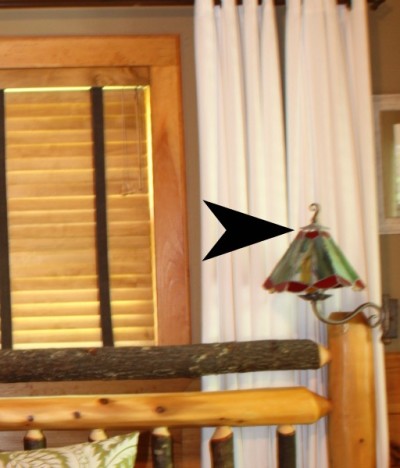
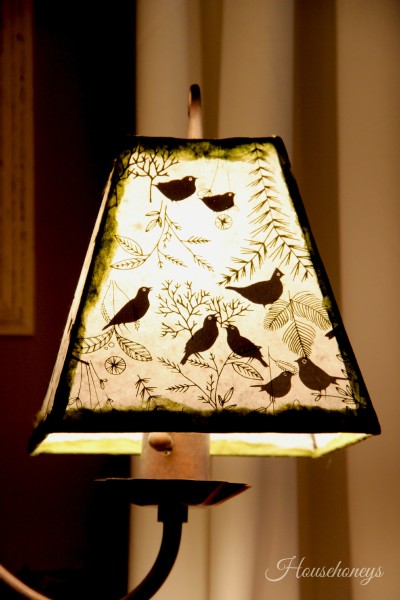
Excuse the blurriness of the above picture but I had to crop it a LOT to get a close up of the lamp and in the process things got a little wonky, but I think you can see what I mean.
Now on to the paper shade!
Materials Needed:
- A wire shade. I choose this one which I got on ebay. *Please keep in mind these instructions are ONLY for straight sided shades.* Mine happen to have four sides, but you can certainly make a six sided shade and the instructions are the same.
- Marker
- Straight Edge. This is optional but I found it handy to connect the lines properly after tracing.
- Brown thick paper (like the kind used for paper bags)
- Vellum, which is available in most craft stores. If you can’t find a large sheet, use regular 8 1/2 x 11 individual sheets. You will need one sheet for each side, so if you’re working with a four sided shade you will need four sheets. I purchased an 18×24 sheet for less than $3 at an art supply store and I had some left over. (Vellum is very popular for invitations so it’s easy to find.)
- Paper of choice. I got mine from Paper Source. Just make sure it’s translucent enough so light can shine through. Two sheets, which are about 18 x 24, is enough and mine cost less than $5 a piece.
- ‘Soft’ paper of choice for trim, OR, regular trim of choice from fabric store. If you go this route, make sure the trim on the top and bottom is a bit thicker than the vertical trim. It just looks better ;).
- PVA glue, available at any craft store. (This glue dries clear)
- Disposable brush for glue
- Wood clothespins
- Scotch tape
- Something to protect your work surface. I usually use old sheets or towels.
Instructions:
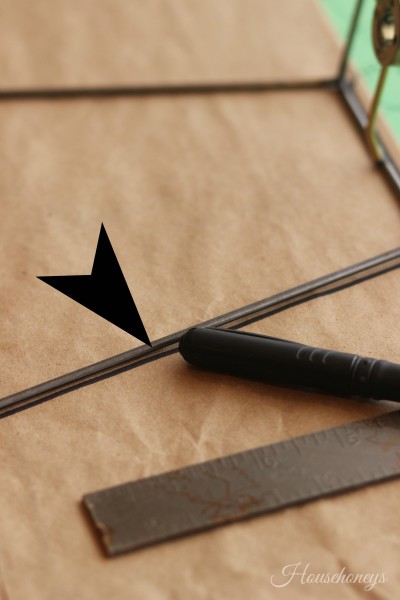
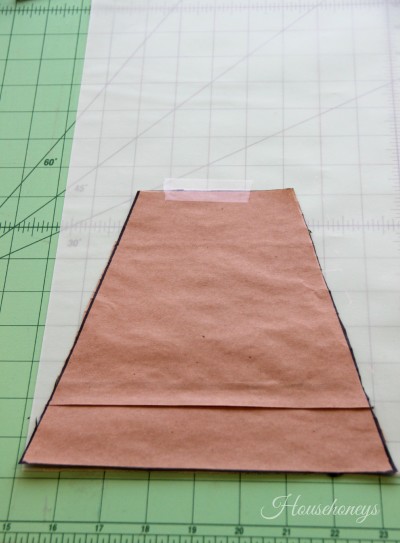
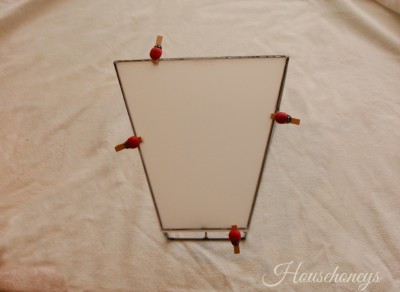
- Take your wire frame and place it onto the brown paper and trace around the edges. Cut out along the outside of the lines, then place it on one side of the frame to make sure the edges lie on the wires comfortably. Check all sides for fit with the same piece of paper. If it fits all sides (sometimes lamp frames aren’t perfect and it might be off a bit), use the paper cut out as a template for all four sides when cutting out the vellum. If it doesn’t fit properly, cut more brown paper pieces until you have what you need for the vellum cut outs.
Take your paper template and cut out the vellum pieces for all four sides (or six if that’s what you’re using). Try to keep your pieces uniform if possible. If you mess up, you can always trim away the excess, so it’s better to make it slightly larger than smaller.
When you’re finished cutting out your vellum pieces, grab your brush and spread some glue on one side of the frame and position a piece of vellum on the frame, working from the middle outward, and using your finger, make sure your vellum is in contact with the frame completely and then use your clothespins to secure. On the OPPOSITE side of the frame, repeat this procedure. So basically you will have two openings and two sides covered with vellum at this point. Let dry. *TIP* To speed up the drying process, use a blow dryer. This also helps to keep the vellum from bunching up if you happen to put too much glue on.
When completely dry, do the remaining two sides. You will only be able to pin on the top and bottom for these two sides since the other two are in the way.
When all four sides are done, repeat the procedure this time using your decorative paper, using the brown paper bag (or vellum if you choose) for your template to cut out the decorative paper. Remember to work on opposite sides first and let dry. Don’t worry if the pieces are not perfect. The trim will soon save you!
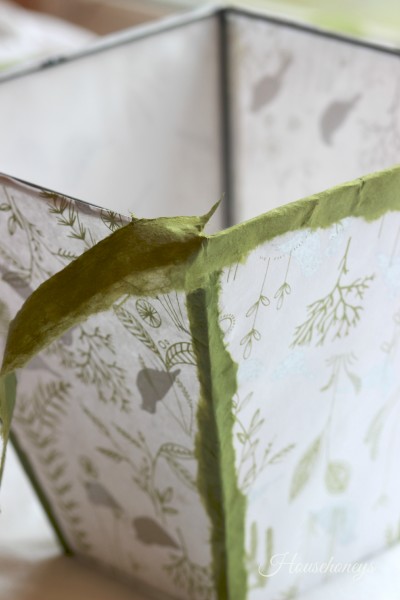
This was my favorite part because it’s soooooo easy! Rip your paper trim so you have some rough, uneven edges as shown. Make the pieces that you’re placing on the top and bottom slightly wider than the vertical pieces. Working with your vertical pieces first, run a small amount of glue on one wire and place the paper on it, bending as needed. Repeat for the remaining three sides and let dry, then finish off the top and bottom of the frame, clipping the paper a bit in the corners as shown to avoid excess bulk and folding over the paper to the inside of the shade as needed.
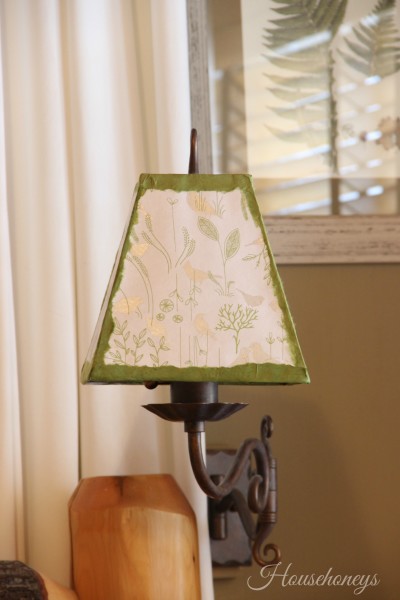
When everything is dry, you’re done! There, wasn’t that easy??! And look how cute it looks! When I found this paper, I didn’t quite realize how well it would go in the bedroom at first. I forgot about the ‘bird’ pillow that Ihad, but I’m really liking the way it looks. Subtle but effective, and perfect for a casual decorating theme. Of course, you can fancy this up with elaborate trim and that would look great too!
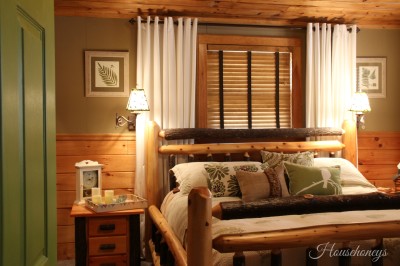
Here’s a picture of the bedroom with the lamps off and the next one with the lamps on. If you’ve been following along, you can tell this picture was taken a while ago because we sold the ‘log’ tissue holder on the right nightstand at our moving sale ;).

What do you think? Would you give this project a try? I hope so! Next time I’m going to think about doing a drum shade. That process will be quite different but I’m sure just as fun!
Update on the move: So right now we’re not completely unpacked. Fisherman hurt his back and that’s slowed things a bit but we are making progress, slowly but surely. I’m ‘missing’ lots of things like my iPod, prescription glasses, the infamous ‘Chuckie’,(if you don’t know who I’m talking about click the link and read about him) hair ornaments I was going to use in my hair at the wedding, and who knows what else! It’s unbelievable I tell ya’! Do you think the cabin is haunted? I’m beginning to wonder, because I definitely didn’t leave Chuckie behind but he’s no where to be found :(. Something tells me our daughter won’t mind…
P.S. Wanna buy some broken stained glass sconces?


Great idea! i love the colors you used!
You have such beautiful furniture and these are perfect for your decor. I thought it was beautiful….and then you turned the light on! WOW! It’s gorgeous! Very nice project. Thanks so much for taking the time to show us the how to! Hugs! Hope your weekend goes well!
Really cute idea and great tutorial. I have a couple of shades I really need to recover. I need to put aside some time to just DO IT! Loe your colors, too- xo Diana
You are such a whiz! I love this; it’s absolutely adorable! And you’re right: it’s quite straightforward and simple enough. Love the earthy greens and the cute birds you used; so cute and calming, as is the cabin, even though it may be a tad haunted – the more, the merrier!
Happy weekend, my friend!
xx
Poppy
Great idea…didn’t know this could be done DIY! Love the pretty shade all finished and lit up! 🙂
I love this Doreen! And thank you for the detailed instructions.
You knew I would need them-Ha!
You make that lampshade look so easy – love it!
Doreen this is really cute and I love the birds on the shade with the light reflecting through. Hope things settle down soon.
Cynthia
Oh no, where did Chuckie go???!!!! That’s kinda freaky! But, I love your lamp shades!!! Love the way the birds stand out when the lamp is turned on!! Hope you find everything soon, especially Chuckie!!!~~Angela
That shade is so cute! Especially with the light on – then you can see the pattern even better!
I read your account of your drive – I don’t think I could have done it. I probably would have walked. I’m such a chicken when it comes to driving in bad weather. I don’t even like to drive when it rains!
Hi Doreen, wow how pretty the lampshades came out and what a great tutorial! You were so creative and thanks! Thanks for taking the time to stop by and leave the nice comment on my dishcloths. Did you move to your country house? I do hope all is well with you and take care and Happy Mothers Day!
Julie at Julie’s Lifestyle
These turned out beautifully, I would do this project in a flash! I looking around at my lampshades to see if I have any I can do this to. I might just have to go out and scrounge up a few from the local thrift. I really, really like the ripped paper trim. With all you have going on, I’m glad you took a little break to DIY. I’m hoping those missing items show up soon or you might have to call in the ghost busters, lol!